How to Standardize Ngrok Tunnels in Your Dev Environment
A walkthrough of Tilt's ngrok operator
A solid network tunnel is like the swiss army knife of microservice development: once you can set one up easily, it has all sorts of fun use cases.
ngrok is a tunneling tool that lets you share anything
running locally on a public URL. Once you have a public URL, you can:
-
Share your in-progress server with a teammate.
-
Send webhook notifications from any tool you use day-to-day (GitHub, Slack) to your local machine.
-
Connect your staging service to your local dev instance.
But to use it, you need to set aside a separate terminal and configure the
ngrok server to point to the right place.
That’s why I wrote a little ngrok operator for Tilt.
Because Tilt coordinates my dev environment, it already knows all the URLs of servers I’m running. We can have Tilt automatically configure ngrok for me and point me in the right direction.
Let me show you!
The ngrok extension
You can try the ngrok extension without even adding it to your Tiltfile.
If you have an active Tilt session, run this in a terminal:
$ tilt create repo default https://github.com/tilt-dev/tilt-extensions
extensionrepo.tilt.dev/default created
$ tilt create ext ngrok
extension.tilt.dev/ngrok created
This installs the ngrok extension in any running Tilt instance.1
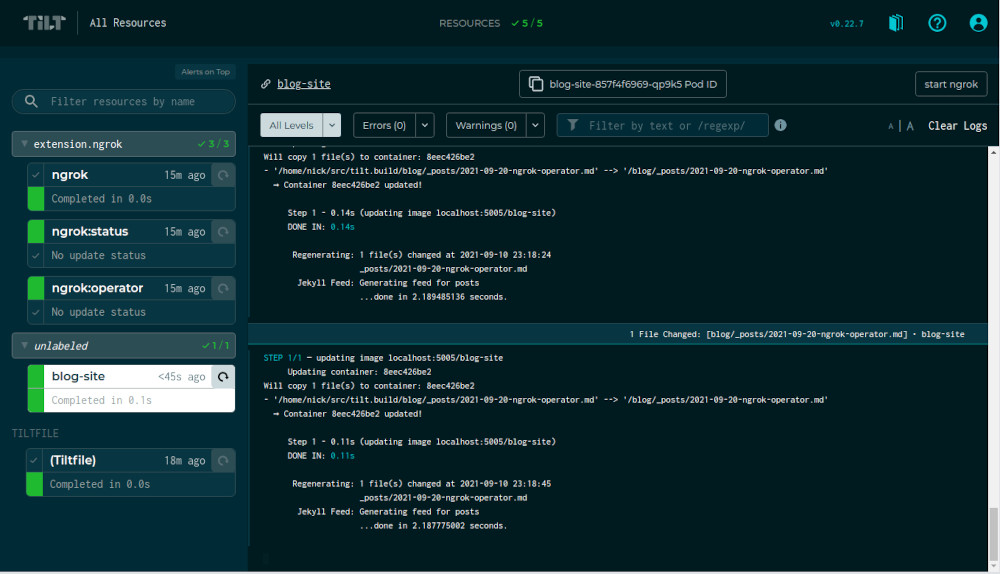
You’ll see three new resources appear in your dashboard:
1) A configuration resource, which monitors the health of the extension.
2) An ngrok:status resource, which monitors the health of the ngrok server.
3) An ngrok:operator resource, which checks which servers are eligible for ngrok tunnels.
Here’s what that looks like when I run our blog in Tilt itself:

All the ngrok servers are grouped together, so I can collapse them if I want.
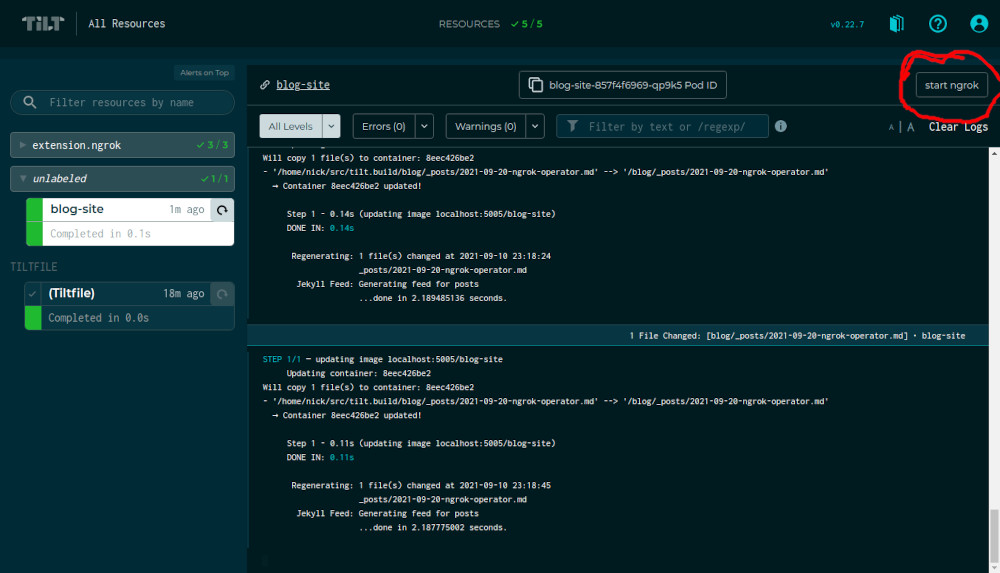
When I view the logs of my blog, I have a new start ngrok button in the upper-right:

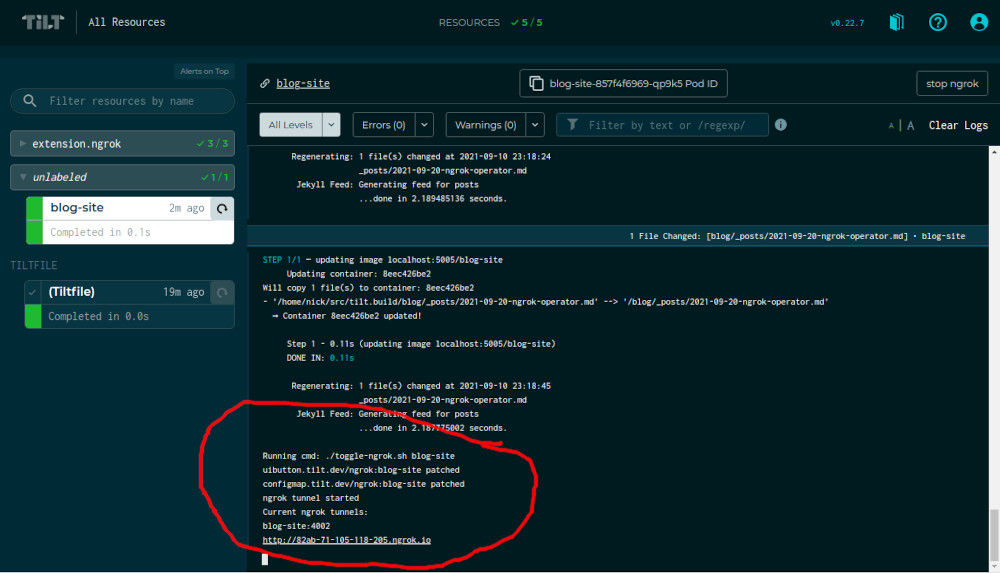
If I click the button, Tilt configures ngrok with a tunnel to my blog on a public URL:

Now, posting your in-progress work to a public URL can be scary. Maybe you want an extra level of security so that the public URL can only be accessed by people you trust.
That’s why Tilt’s extension system supports arguments.
The ngrok extension supports an --auth flag that lets you set a username and
password for the ngrok tunnel.
$ tilt delete ext ngrok
extension.tilt.dev "ngrok" deleted
$ tilt create ext ngrok -- --auth=admin:cats
extension.tilt.dev/ngrok created
Now, any tunnels Tilt creates will be protected by a bare bones HTTP basic auth alert.2
Generalizing this to Any Tunnel Running Anywhere
The best part about the ngrok extension is that I was able to hack it together
with Bash without modifying core Tilt. And there’s very little here that’s
specific to how or where you’re running your server.
The current ngrok extension will work for any localhost URL that Tilt knows
about! In this example, I’m using a Kubernetes Deployment running on my cluster
with a portforward to localhost:4040. But it can also work for a
local_resource-based server, or a server running in Docker Compose.
This approach also generalizes to other tunneling tools! ngrok is just a
popular one that’s easy to configure. We’ve also met teams who use the Inlets
Operator or the Cloudflare Argo
Tunnel or even their own
proprietary in-house tunnels that have special features for their tech stack.
If there’s a tunneling tool you use, and you don’t see yet in our extensions repo, that just means we haven’t had time to add it yet! We’re always happy to help shepherd PRs or collaborate with folks to put them together.3
-
If you want to always run
ngrokin your dev environment, you can add this to yourTiltfile:v1alpha1.extension_repo(name='default', url='https://github.com/tilt-dev/tilt-extensions') v1alpha1.extension(name='ngrok', repo_name='default', repo_path='ngrok')This is equivalent to the CLI commands above. ↩
-
Similarly, you can configure arguments in your
Tiltfileas:v1alpha1.extension_repo(name='default', url='https://github.com/tilt-dev/tilt-extensions') v1alpha1.extension(name='ngrok', repo_name='default', repo_path='ngrok', args=['--auth=admin:cats'])This is equivalent to the CLI commands above. ↩
-
To start developing your own extension, use this CLI command:
tilt create repo default file:///absolute/path/to/repoWe use a
file:///URL instead of a normal github URL for the extension repo, so that it will read the extensions from disk. ↩


